Get an API key
First-time setup: follow this page in order. Confirm that your account has usable credit, create an API key, then copy the Base URL into your client. If something fails, send a screenshot of the current step to support so the issue can be checked quickly.
This page helps you do three things:
- Confirm that your account has usable credit.
- Create and save an API key.
- Copy the Base URL your client will use.
Open the console
After signing in to the SU8.Codes console, the left navigation shows the main areas you will use:
- Packages and balance: check package quota and wallet balance, buy a package, or top up.
- Key management: create, copy, and manage API keys.
- Usage: review request records and spend.
If you are not signed in yet, opening the console will take you through login or registration first.
1. Prepare usable credit
An API key is only the credential. Actual requests also need usable credit on your account. Open Packages and balance from the left navigation and confirm that you have either package quota or wallet balance.
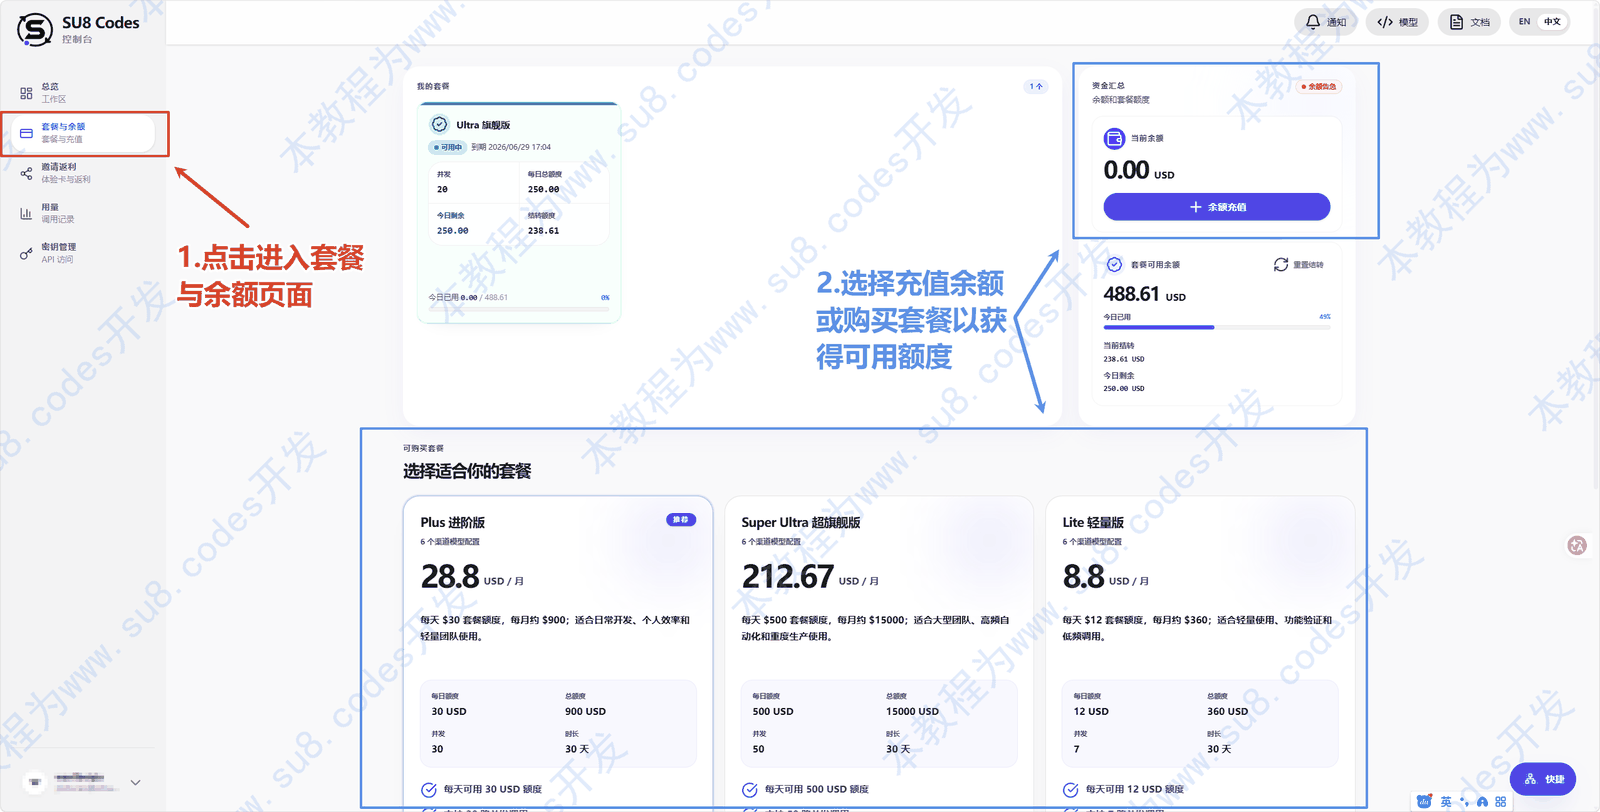
Choose the option that matches how you plan to use SU8:
- Buy a package: better for regular usage and easier quota planning.
- Top up balance: better for temporary calls, extra usage, or using balance alongside a package.
If you have no credit after registration, finish this step before creating a key. A key can still be created, but calls may fail if there is no usable credit.
2. Create an API key
Open Key management from the left navigation, then select Create key in the top right. After the key is created, copy it and save it somewhere secure.
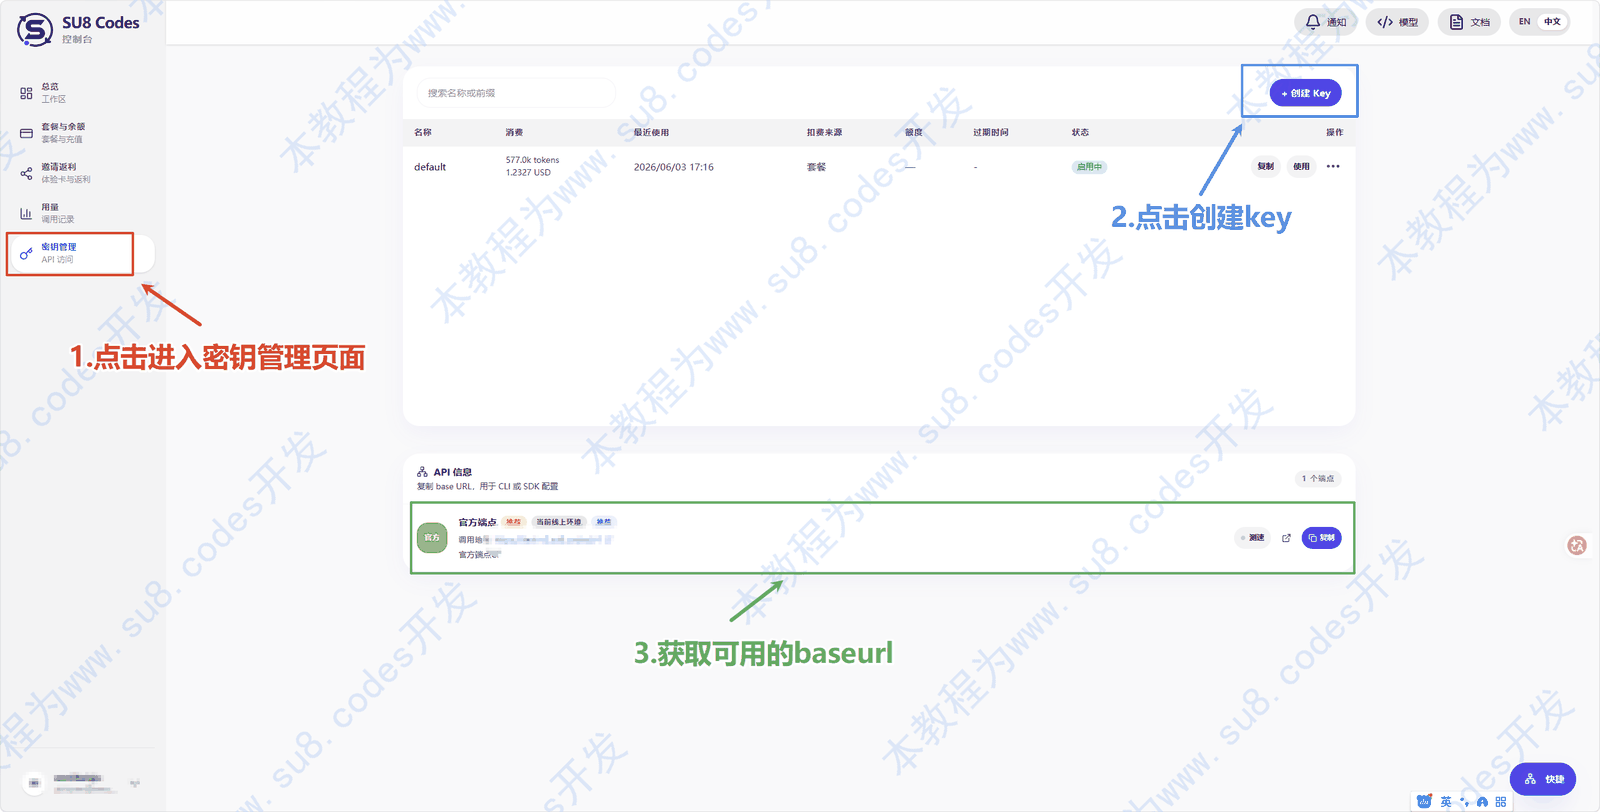
The full API key is usually shown only once when it is created. If you close the dialog before saving it, delete that key and create a new one.
Keep the key safe:
- Do not send it to chat groups, screenshots, or public repositories.
- Do not put it in frontend page code.
- If you think the key leaked, disable or delete it in the console and create a new one.
3. Copy the Base URL
After creating the key, stay on Key management and scroll to API information. This area shows the Base URL required by clients.
Most clients need only two fields:
| Field | What to enter |
|---|---|
| Base URL | Use the exact address shown in the console API information area |
| API Key | Paste the key you just created and saved |
If a client asks for a full endpoint URL, check that client’s guide first. Some tools want only the Base URL, while others may ask for a path ending in /responses or /chat/completions.
4. What to do next
After you have the API key and Base URL, choose the next page based on your goal:
- Finish setup fastest: read Fast setup, which recommends one-click CCS import.
- Check whether the key works: open API tester and run a test in the page.
- Configure official clients: start with Codex CLI. Codex App and the VS Code extension reuse the same setup.
- Configure third-party tools: choose OpenCode, Claude Code, Gemini CLI, Cline, Roo Code, Kilo Code, OpenClaw, or Hermes.
- Call the API from code: read API examples for curl, Python, and Node.js.
- Confirm model IDs: read Models and channels and copy the model ID shown in the page.
If this is your first time, use this order: Fast setup -> API tester -> the client guide you need.
If a test fails, check these three things first: whether the account has usable credit, whether the API key was copied completely, and whether the Base URL is correct.